For many the new year marks the start of the annual spring clean, where they spend the first few months tidying up and clearing clutter. Likewise, it’s good to regularly clear the decks of your Windows laptop or PC by giving it a thorough clean that reaches deep into the nooks and crannies. That’s because computers slow down over time — but you can put the zip back into them quickly, safely, and easily in just a few steps.
Step 1: Cleanup your PC with a good folder structure
Whether it’s your kitchen cupboard or the closet, at home we sort things the way that works best for us so we have everything readily to hand. If the cupboards are too full, we check what we don’t need and get rid of what we no longer want.
But the situation is quite the opposite for many when it comes to their own Windows laptop or PC, with downloaded contracts or invoices strewn across the desktop or simply kept in the email app. This is where a smart filing system kills several birds with one stone. Once you’ve gone through all your files and moved them to a logical folder structure, you can find everything quickly on your computer. Just imagine the time you’ll save never having to hunt around for things again — and you may have finally deleted quite a few files that you no longer need along the way.
It’s well worth creating folders and even subfolders, and always storing key documents and correspondence there directly. You could use this folder structure:
- Insurance policies
- Purchases with warranties
- Contracts with payments
- Financial affairs (tax/banking info)
- Work-related/career matters
- General
- Personal affairs (pictures)
Top tip: You may find that energy providers, banks, and insurance firms send invoices and contracts with rather cryptic file names that are difficult to decipher. If you rename these files when storing them in one of your folders, you’ll find these documents much more quickly again should you ever need to.
Say goodbye to large, unnecessary files
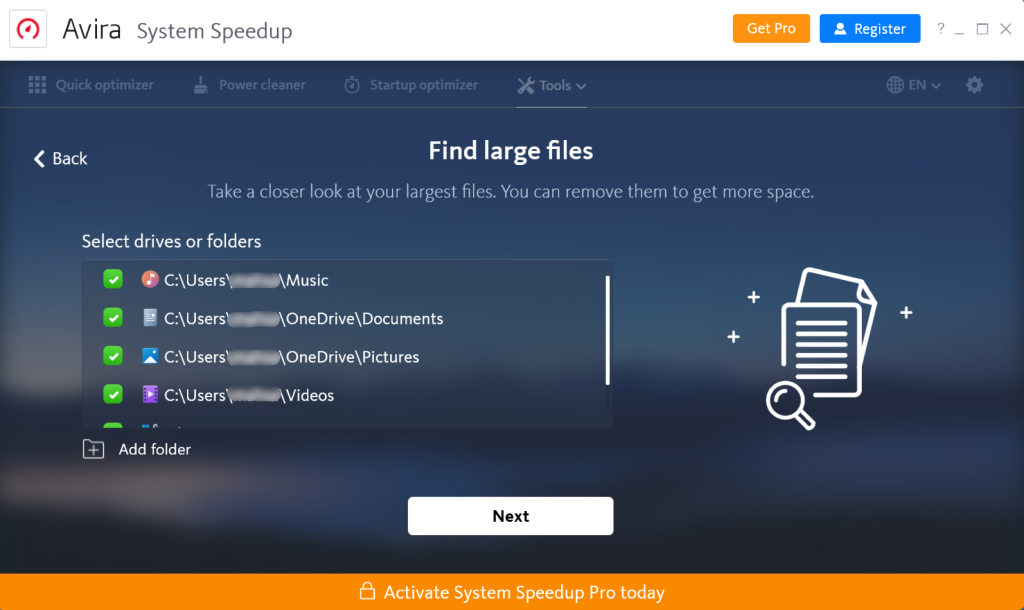
That short video to mark the new year, the countless versions of the same family photo, space-consuming tutorials for self-explanatory apps — the list is endless. But a lot of what you save somewhere quickly actually ends up languishing on the hard drive, eating in to your Windows laptop or PC’s performance, i.e. its speed. To prevent this, it’s a really good idea to give your PC a thorough deep clean on a regular basis.
There are many free tools that can help you find out which files are consuming large amounts of storage space. Among them, WizTree analyzes your files, showing you them clearly sorted by size in a diagram so you can quickly get an overview and delete any unwanted files directly in the app.
Avira System Speedup has the added advantage in that it can also check your Windows laptop or PC’s hard drive for duplicate or dummy files at the same time. This solution from Avira is also impressive because of the many other handy additional tools it includes.
Top tip: You can only use some of Avira System Speedup’s many tools to their full extent once you purchase the Pro version. That said, the big advantage is that you can get going with giving your PC a thorough clean right away using the free version of the app.
Back up to be on the safe side
Once you’ve gone through all the files on your Windows laptop or PC and arranged them in the folders you created, backing up your entire drive ensures you won’t loose any important data. You should definitely perform this step as part of a thorough PC cleanup.
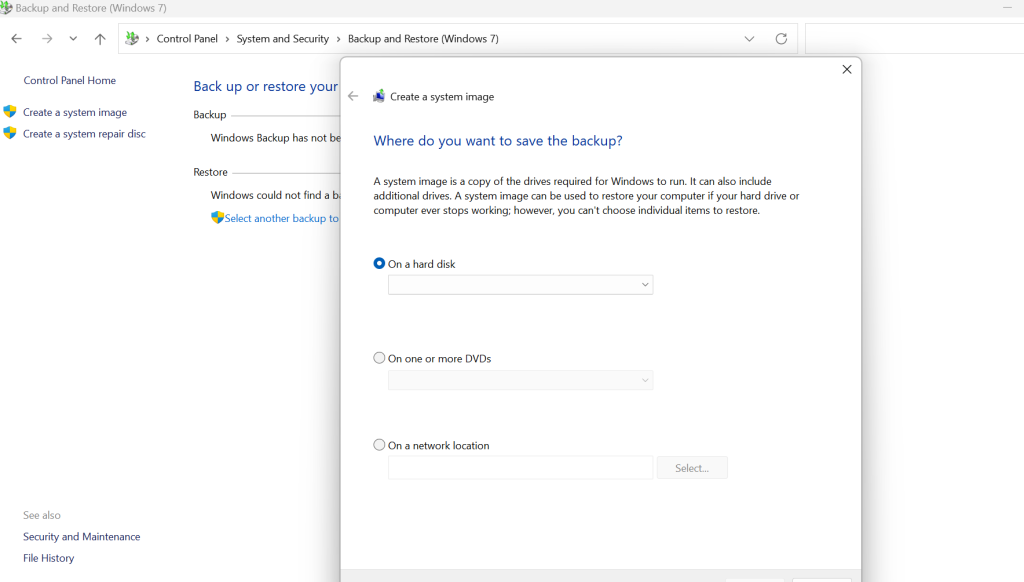
It’s easy to back up your computer’s hard drive using Windows 10 or 11’s built-in backup tool. Simply open the Start menu and type Control Panel. Open Back up and Restore (Windows 7), then click Create a system image on the left. Now just choose where you want to save the backup — such as an external drive or using a cloud service. Once started, the actual back-up process will take anywhere from several minutes to a few hours depending on how much data you need to back up.
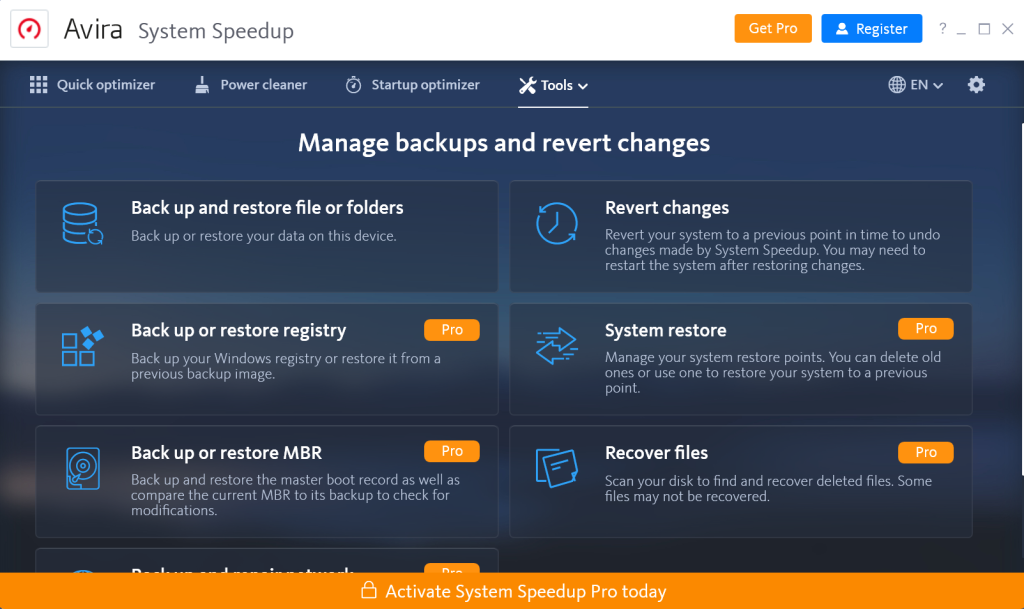
Top tip: Avira System Speedup Pro provides you with all the functions you need to manage and back up your Windows laptop or PC, and is an easy-to-use alternative to using Windows’ built-in back up tool.
Step 2: Uninstall outdated and unnecessary apps and programs
Your Windows 10 or 11 laptop or PC came with a lot of preinstalled apps when you got it. But hand on heart: Many of these apps are unnecessary. They sap your computer’s speed, running unnoticed in the background. Which of the apps automatically preinstalled with Windows are actually useful to you is, of course, for you to decide. But you’ll certainly find that you won’t need some of these apps, such as Solitaire or Microsoft Pay, etc.
The good news is that even the free version of Avira System Speedup helps you analyze and remove unnecessary apps and programs, duplicate files as well as dummy and extremely large files, making it perfect for tackling everything involved in this second step with ease.
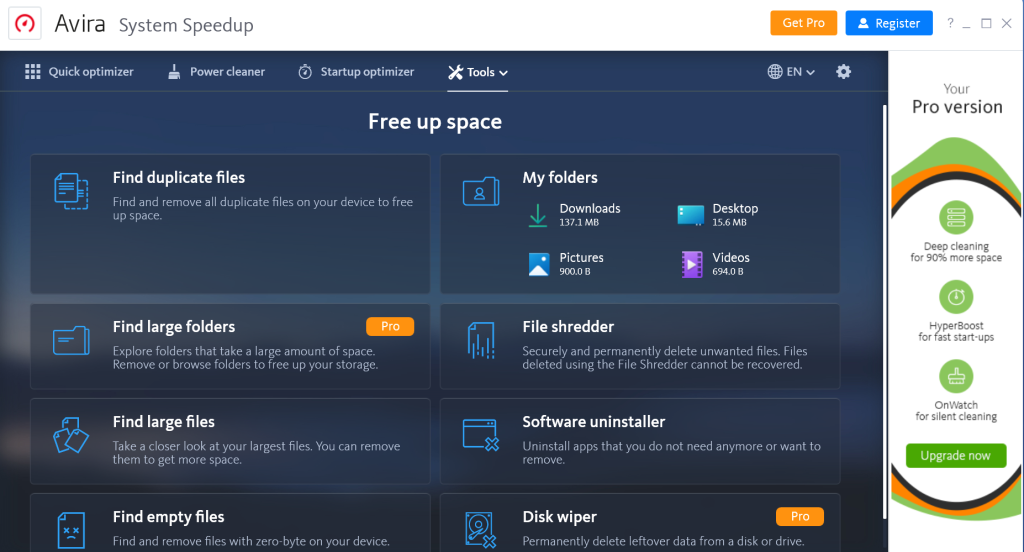
Whenever you uninstall an app or program you no longer need, the associated registry entries are also deleted from your hard drive. But what makes this tool special is its impressive range of functions. To name just one, you can use Avira System Speedup to optimize your Windows laptop or PC’s start time. You’ll notice your laptop will be much zippier after giving your computer a thorough cleanup as part of this step.
Step 3: Keep in check what starts up with your computer for better performance
We all know it: You’re about to start your Windows laptop or PC, and you know as soon as you hit the ON button that it’s going to take some time. It’s probably because some installed programs or apps start up when you turn your computer on, eating up resources that sap speed. You can additionally optimize your laptop’s performance by turning off the ability of non-essential apps and programs to start up with Windows. That’s why this third step is also part of a thorough laptop or PC deep clean.
This fastest way to choose which programs you want to start up automatically is also pretty simple: Press the CTRL + ALT + Delete keys to open Task Manager. For better performance, under the Startup tab you can choose which programs you want to start up, and which ones you don’t, when you turn on your computer.
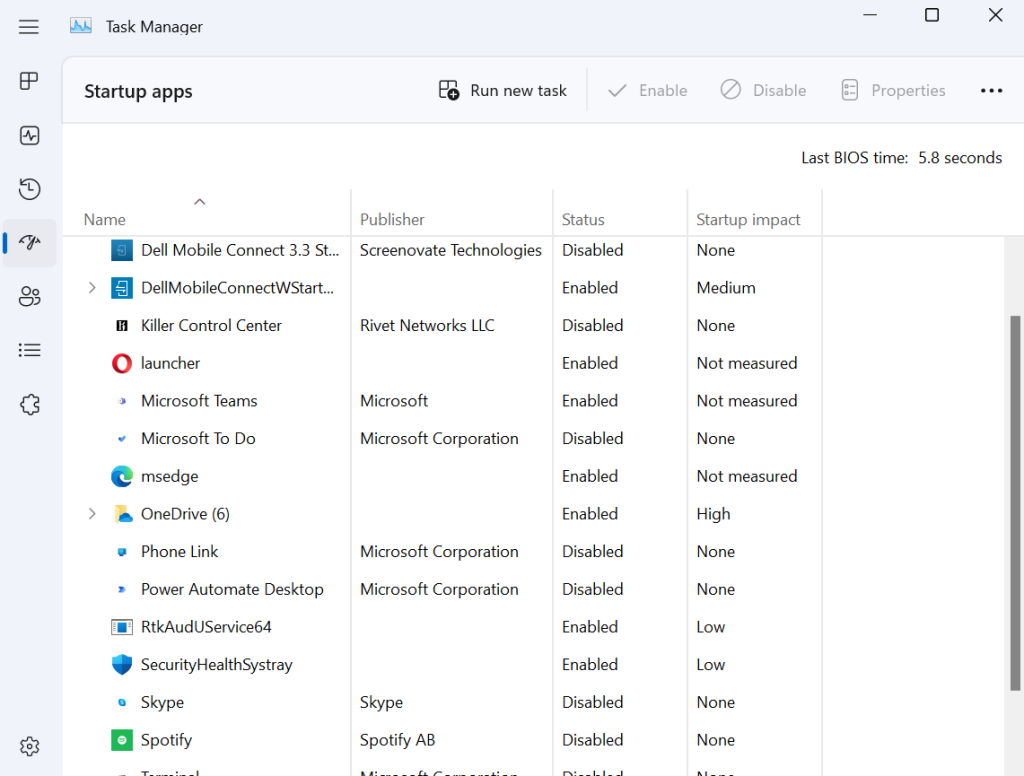
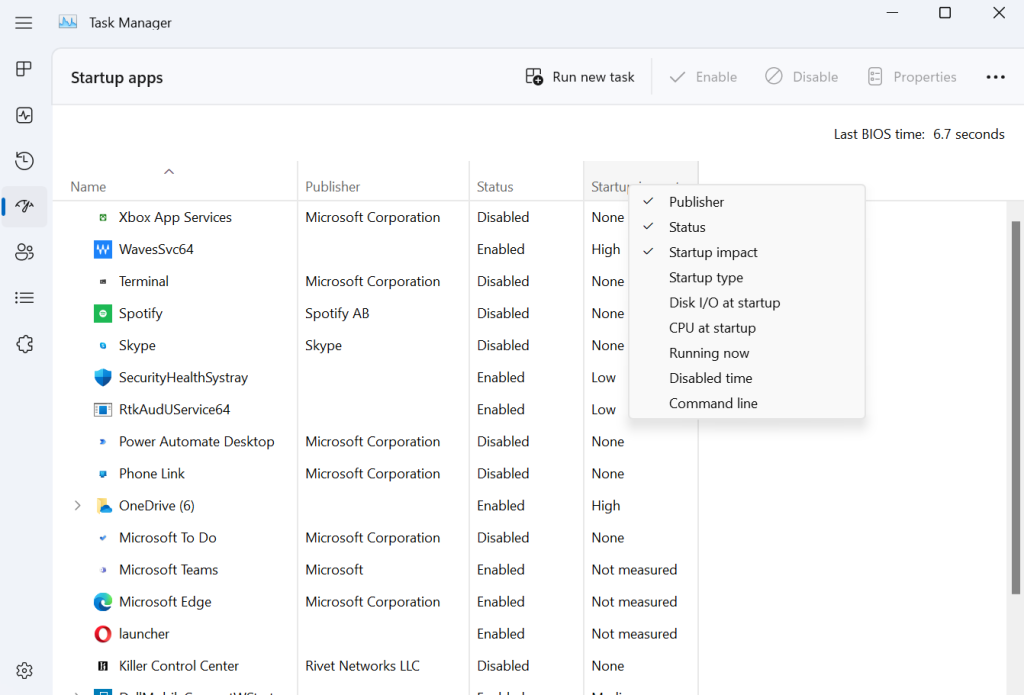
Top tip: The Startup impact column gives you a good idea of what kind of impact a particular app has on your Windows laptop or PC’s start time. Can’t see the column? It’s easy to display it: Simply right-click the status row, then select the information you need from the context menu.
Step 4: Delete temporary files and cleanup your registry
You’re almost done! This is the final, key step to giving your Windows laptop or PC a thorough deep clean. If you’ve used Revo Uninstaller or a similar app to uninstall unnecessary apps and programs, some registry entries will have also been removed.
But there’s more to it than that when it comes to optimizing your Windows PC or laptop’s performance. Avira Junk Cleaner is a free app which removes the residual registry entries as well as temporary and junk files quickly, thoroughly, and — above all — safely so you can put the zip back into your Windows laptop or PC so it feels almost like new again.
Avira Junk Cleaner makes it super-easy for you to clear all that junk from your computer’s hard drive. Once you’ve downloaded and installed it, Avira Junk Cleaner will scan your Windows laptop or PC’s hard drive for data leaks, performance issues, viruses, and network threats. This means that along with having a lean, mean speed machine, you’ve got all the security bases covered too.
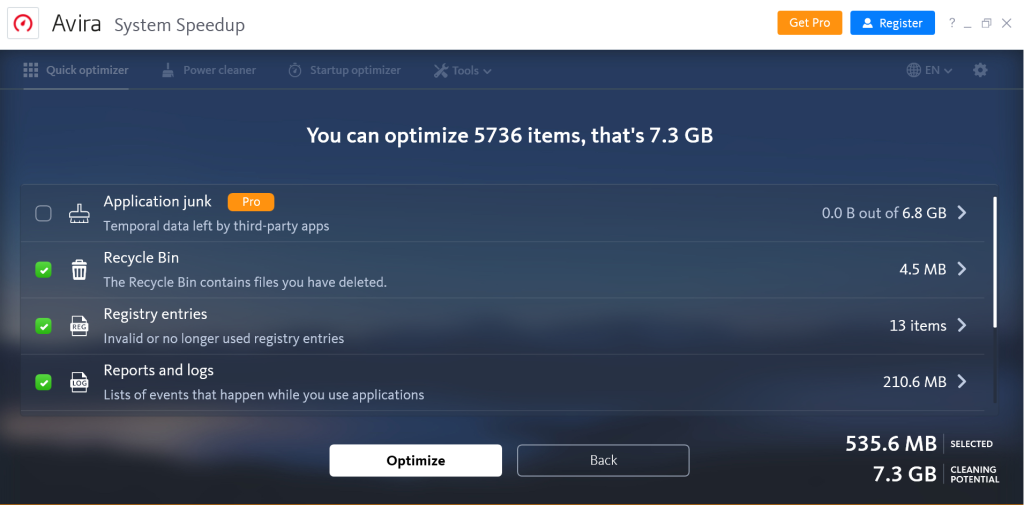
Top tip: Use Avira Junk Cleaner routinely, just like we described in this post, even when you’re not cleaning up your PC. You’ll notice your Windows laptop or PC will keep zipping along.
The free Avira Junk Cleaner app is a great solution for many common optimization needs. If you want to clear away all traces of junk files and want to up your Windows computer’s defenses, we recommend using the feature-rich and complementary tools provided by the great-value Avira Prime bundle — or opting for the bestseller Avira Internet Security.
Check our blog post for information on scanning and repairing Windows hard drives with CHKDSK.


